Linux 驱动安装
环境检查
IOMMU
在Intel、AMD等X86 CPU平台,不建议打开IOMMU。如果使能了IOMMU,性能会有所影响,建议关闭或者设置pass through模式。
备注
SDK V3.4.0(含)已支持IOMMU,SDK V3.4.0之前的版本IOMMU必须关闭或者设置为pass through模式。
如何查询IOMMU已开启?
查看
ls /sys/kernel/iommu_groups目录下是否有IOMMU组,如果目录为空,则当前没有支持IOMMU。查看
dmesg | grep iommu和cat /proc/cmdlineIOMMU的配置模式。
# iommu enabled
$ ls /sys/kernel/iommu_groups/
0  1  10  11  12  13  14  15  16  17  18  19  2  20  21  22  23  24  25  3  4  5  6  7  8  9

# iommu on
$ cat /proc/cmdline
BOOT_IMAGE=/vmlinuz-5.4.18-110-generic root=UUID=6ad21caf-7783-4b20-beab-8587a209f606 ro quiet splash iommu=on quiet splash loglevel=0 resume=UUID=c315bcbf-d4b5-4220-bbb6-9118476be003 security=kysec

# Pass Through
$ cat /proc/cmdline
BOOT_IMAGE=/boot/vmlinuz-6.8.0-57-generic root=UUID=9f8f7b78-45bd-41c7-a2c4-cef9dfd6b6ca ro quiet splash iommu=pt quiet splash vt.handoff=7
配置IOMMU off或者pass through模式
Intel CPU
$ sudo vi /etc/default/grub
GRUB_CMDLINE_LINUX="quiet splash intel_iommu=off"

$ sudo update-grub
$ sudo reboot
AMD CPU
$ sudo vi /etc/default/grub
GRUB_CMDLINE_LINUX="quiet splash amd_iommu=off"

$ sudo update-grub
$ sudo reboot
Pass Through
$ sudo vi /etc/default/grub
GRUB_CMDLINE_LINUX="quiet splash iommu=pt"

$ sudo update-grub
$ sudo reboot
IRQBalance
IRQBalance 服务能让硬件中断信号平均上报在多个CPU上,从而解决单CPU过载的问题。子卡运行过程中会通过MSI等方式向主机CPU上报中断,如果多张卡同时运行繁忙的DMA拷贝任务,在未开启 IRQBalance的服务器上,中断将集中上报某个CPU,会存在性能问题,而且板卡越多,性能问题越严重。
备注
查询irqbalance包是否已安装?
$ dpkg -s irqbalance # debian
$ rpm -qi irqbalance # redhat
查询irqbalance是否已启用?
$ systemctl status irqbalance
启用irqbalance
$ sudo systemctl start irqbalance     # 启动服务
$ sudo systemctl enable irqbalance    # 开启启动
SecureBoot
驱动安装暂不支持安全启动模式,需要在UEFI BIOS中关闭SecureBoot。
$ sudo mokutil --sb-state
SecureBoot disabled
支持列表
SDK已测试过的支持的主控如下表所示:
| 主控 | 芯片 | 安装包 |
|---|---|---|
| CentOS 9 stream | INTEL、AMD64 | axcl_host_x86_64_Vxxx.rpm |
| Kylin V10 SP1 | INTEL、AMD64、Phytium(ARM64) | x86_64: axcl_host_x86_64_Vxxx.deb arm64: axcl_host_aarch64_Vxxx.deb |
| UOS | INTEL、AMD64 | axcl_host_x86_64_Vxxx.deb |
| RK3588 | ARM64 | axcl_host_aarch64_Vxxx.deb |
| RaspberryPi5 | ARM64 | axcl_host_aarch64_Vxxx.deb |
| OpenEuler | INTEL、AMD64 | axcl_host_x86_64_Vxxx.rpm |
| ubuntu 18.04/22.04 | INTEL、AMD64 | axcl_host_x86_64_Vxxx.deb |
安装依赖
PCIe设备
将PCIe设备接入主控,lspci确认是否能识别到设备,参阅FAQ 如何查询设备章节
make
make -v检查make是否已安装
$ make -v
GNU Make 4.3
gcc
gcc -v检查gcc是否已安装。AXCL runtime基于C++17标准开发,因此gcc要求最低为9.4.0。如何升级gcc,参阅FAQ。
$ gcc -v
gcc version 12.2.0 (Debian 12.2.0-14)
驱动安装
安装包
| 安装包关键字 | 架构 | 说明 |
|---|---|---|
| x86_64 | x86_64 | Intel、AMD |
| aarch64 | ARM64 | raspberry, rocky(rk3588), 飞腾(Phytium, D2000)等 |
重要
如果已安装过AXCL驱动包,请先卸载驱动。
ubuntu等debian系统
Step1:硬件连接
将M.2或PCIe板卡插入物理机
Step2:系统更新
$ sudo apt update && sudo apt upgrade -y
$ sudo reboot
备注
系统更新可能耗费时间较长,建议更换国内镜像源(如:清华源)。
ubuntu22.04内核gcc版本和预装的gcc不一致,安装gcc-12
$ sudo apt install gcc-12
$ sudo update-alternatives --install /usr/bin/gcc gcc /usr/bin/gcc-12 12
Step3:安装linux headers
$ sudo apt install -y linux-headers-$(uname -r)
Step4:安装AXCL
$ sudo apt install -y ./xxx.deb
重要
SDK V3.4.0 以前的SDK版本仅支持dpkg安装,请执行sudo dpkg -i ./xxx.deb
Step5:验证安装
查看安装包信息
$ apt show axclhost
执行axcl-smi,确认设备能正确找到
$ axcl-smi
+------------------------------------------------------------------------------------------------+
| AXCL-SMI  V3.4.0_20250418095028                                  Driver  V3.4.0_20250418095028 |
+-----------------------------------------+--------------+---------------------------------------+
| Card  Name                     Firmware | Bus-Id       |                          Memory-Usage |
| Fan   Temp                Pwr:Usage/Cap | CPU      NPU |                             CMM-Usage |
|=========================================+==============+=======================================|
|    0  AX650N                     V3.4.0 | 0000:03:00.0 |                153 MiB /      945 MiB |
|   --   38C                      -- / -- | 1%        0% |                 18 MiB /     7040 MiB |
+-----------------------------------------+--------------+---------------------------------------+

+------------------------------------------------------------------------------------------------+
| Processes:                                                                                     |
| Card      PID  Process Name                                                   NPU Memory Usage |
|================================================================================================|
centos等redhat系统
Step1: 硬件连接
将M.2或PCIe板卡插入物理机
Step2:系统更新
$ sudo yum update -y
$ sudo reboot
备注
系统更新可能耗费时间较长,建议更换国内镜像源(如 清华源)。
Step3:安装linux headers & devel
$ sudo yum install -y kernel-headers-$(uname -r) kernel-devel-$(uname -r)
Step4:安装AXCL
$ sudo yum install -y ./xxx.rpm
重要
SDK V3.4.0 以前的SDK版本仅支持rpm安装,请执行sudo rpm -Uvh --nodeps xxx.rpm
Step5:验证安装
查看安装包信息
$ yum info axcl_host
执行axcl-smi,确认设备能正确找到
$ axcl-smi
+------------------------------------------------------------------------------------------------+
| AXCL-SMI  V3.4.0_20250418095028                                  Driver  V3.4.0_20250418095028 |
+-----------------------------------------+--------------+---------------------------------------+
| Card  Name                     Firmware | Bus-Id       |                          Memory-Usage |
| Fan   Temp                Pwr:Usage/Cap | CPU      NPU |                             CMM-Usage |
|=========================================+==============+=======================================|
|    0  AX650N                     V3.4.0 | 0000:03:00.0 |                153 MiB /      945 MiB |
|   --   38C                      -- / -- | 1%        0% |                 18 MiB /     7040 MiB |
+-----------------------------------------+--------------+---------------------------------------+

+------------------------------------------------------------------------------------------------+
| Processes:                                                                                     |
| Card      PID  Process Name                                                   NPU Memory Usage |
|================================================================================================|
Raspberry Pi 5
准备工作
在树莓派 5 上安装 AX650 加速卡时,首先需要准备一块 M.2 HAT+ 扩展板。参考官方链接,M.2 HAT+ 的官方版本只支持 2230、2242 的 M.2 M Key 卡,通常 AX650 加速卡是 2280 的,您可能需要考虑购买第三方的支持 2280 长度的 M.2 HAT+ 扩展板。
警告
根据树莓派硬件批次不同,可能需要更新一下树莓派的 EEPROM 设置。具体步骤如下:
如同 PC 中的 BIOS,EEPROM 设置独立于烧录 OS 的 TF 卡,烧录最新的树莓派镜像或者切换镜像版本并不会主动更新 EEPROM 的设置。首先执行 update:
$ sudo apt update && sudo apt full-upgrade
然后检查一下 EEPROM 中的版本:
$ sudo rpi-eeprom-update
如果看到的日期早于 2023 年 12 月 6 日,运行以下命令以打开 Raspberry Pi 配置 CLI:
$ sudo raspi-config
在 Advanced Options > Bootloader Version (引导加载程序版本) 下,选择 Latest (最新)。然后,使用 Finish 或 ESC 键退出 raspi-config。
执行以下命令,将固件更新到最新版本。
$ sudo rpi-eeprom-update -a
最后使用 sudo reboot 重新启动。重启后就完成了 EEPROM 中 firmware 的更新。
警告
取决于使用的树莓派 kernel 状态,目前的修改是以 2024年11月18日 以前的树莓派刚烧录好的系统为例进行说明的,客户需要根据树莓派系统更新情况识别这个步骤是否必须。
在当前的树莓派 kernel 和 M.2 HAT+ 组合中,可能会遇到如下限制:
PCIE Device 无法识别
PCIE MSI IRQ 无法申请多个
这些问题将导致安装失败或者子卡起不来。需要检查 Raspberry Pi 5 /boot/firmware/config.txt 文件,并进行修改。
如果是第三方的兼容 M.2 HAT+ 产品,需要注意供电问题;在 config.txt 中添加如下描述:
dtparam=pciex1
该描述可以默认打开 PCIE 功能;然后继续增加 PCIE 的设备描述:
[all]
dtoverlay=pciex1-compat-pi5,no-mip
$ screenfetch
         _,met$$$$$gg.
      ,g$$$$$$$$$$$$$$$P.        OS: Debian 12 bookworm
    ,g$$P""       """Y$$.".      Kernel: aarch64 Linux 6.6.74+rpt-rpi-2712
   ,$$P'              `$$$.      Uptime: 3h 4m
  ',$$P       ,ggs.     `$$b:    Packages: 1609
  `d$$'     ,$P"'   .    $$$     Shell: bash 5.2.15
   $$P      d$'     ,    $$P     Disk: 13G / 922G (2%)
   $$:      $$.   -    ,d$$'     CPU: ARM Cortex-A76 @ 4x 2.4GHz
   $$\;      Y$b._   _,d$P'      GPU:
   Y$$.    `.`"Y$$$$P"'          RAM: 631MiB / 8064MiB
   `$$b      "-.__
    `Y$$
     `Y$$.
       `$$b.
         `Y$$b.
            `"Y$b._
                `""""

$ cat /boot/firmware/config.txt
# For more options and information see
# http://rptl.io/configtxt
# Some settings may impact device functionality. See link above for details

# Uncomment some or all of these to enable the optional hardware interfaces
#dtparam=i2c_arm=on
#dtparam=i2s=on
#dtparam=spi=on

# Enable audio (loads snd_bcm2835)
dtparam=audio=on
dtparam=pciex1

# Additional overlays and parameters are documented
# /boot/firmware/overlays/README

# Automatically load overlays for detected cameras
camera_auto_detect=1

# Automatically load overlays for detected DSI displays
display_auto_detect=1

# Automatically load initramfs files, if found
auto_initramfs=1

# Enable DRM VC4 V3D driver
dtoverlay=vc4-kms-v3d
max_framebuffers=2

# Don't have the firmware create an initial video= setting in cmdline.txt.
# Use the kernel's default instead.
disable_fw_kms_setup=1

# Run in 64-bit mode
arm_64bit=1

# Disable compensation for displays with overscan
disable_overscan=1

# Run as fast as firmware / board allows
arm_boost=1

[cm4]
# Enable host mode on the 2711 built-in XHCI USB controller.
# This line should be removed if the legacy DWC2 controller is required
# (e.g. for USB device mode) or if USB support is not required.
otg_mode=1

[cm5]
dtoverlay=dwc2,dr_mode=host

[all]
dtoverlay=pciex1-compat-pi5,no-mip
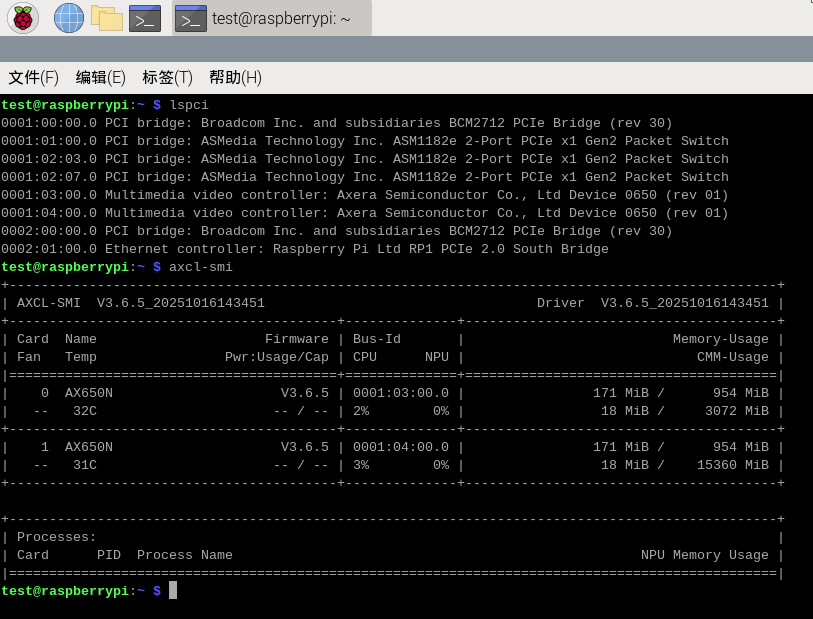
完成修改并重启后,可以使用 lspci 命令检查加速卡是否正确被识别:
$ lspci
0000:01:00.0 Multimedia video controller: Axera Semiconductor Co., Ltd Device 0650 (rev 01)
其中 Multimedia video controller: Axera Semiconductor Co., Ltd Device 0650 (rev 01) 就是 AX650 加速卡。
驱动安装
警告
开发板需要编译支持,依赖 gcc, make, patch, linux-header-$(uname -r) 这几个包。需要提前安装好,或者保证安装时网络可用。
将 aarch64 deb 包复制到树莓派开发板上,运行安装命令:
$ sudo apt install axcl_host_aarch64_Vxxx.deb
重要
SDK V3.4.0 以前的SDK版本仅支持dpkg安装,请执行sudo dpkg -i ./xxx.deb
安装将很快完成。安装时会自动增加环境变量,使得安装的 .so 和可执行程序可用。需要注意的是,如果需要可执行程序立即可用,还需要更新 bash 终端的环境:
$ source /etc/profile
如果是 ssh 的方式远程连接的板卡,还可以选择重连 ssh 进行自动更新(本机终端登录还可以重开一个终端进行自动更新)。
启动子卡
主机启动时,将会自动启动子卡
卸载安装
$ sudo apt remove axclhost
重要
SDK V3.4.0 以前的版本,请执行dpkg -r axclhost卸载
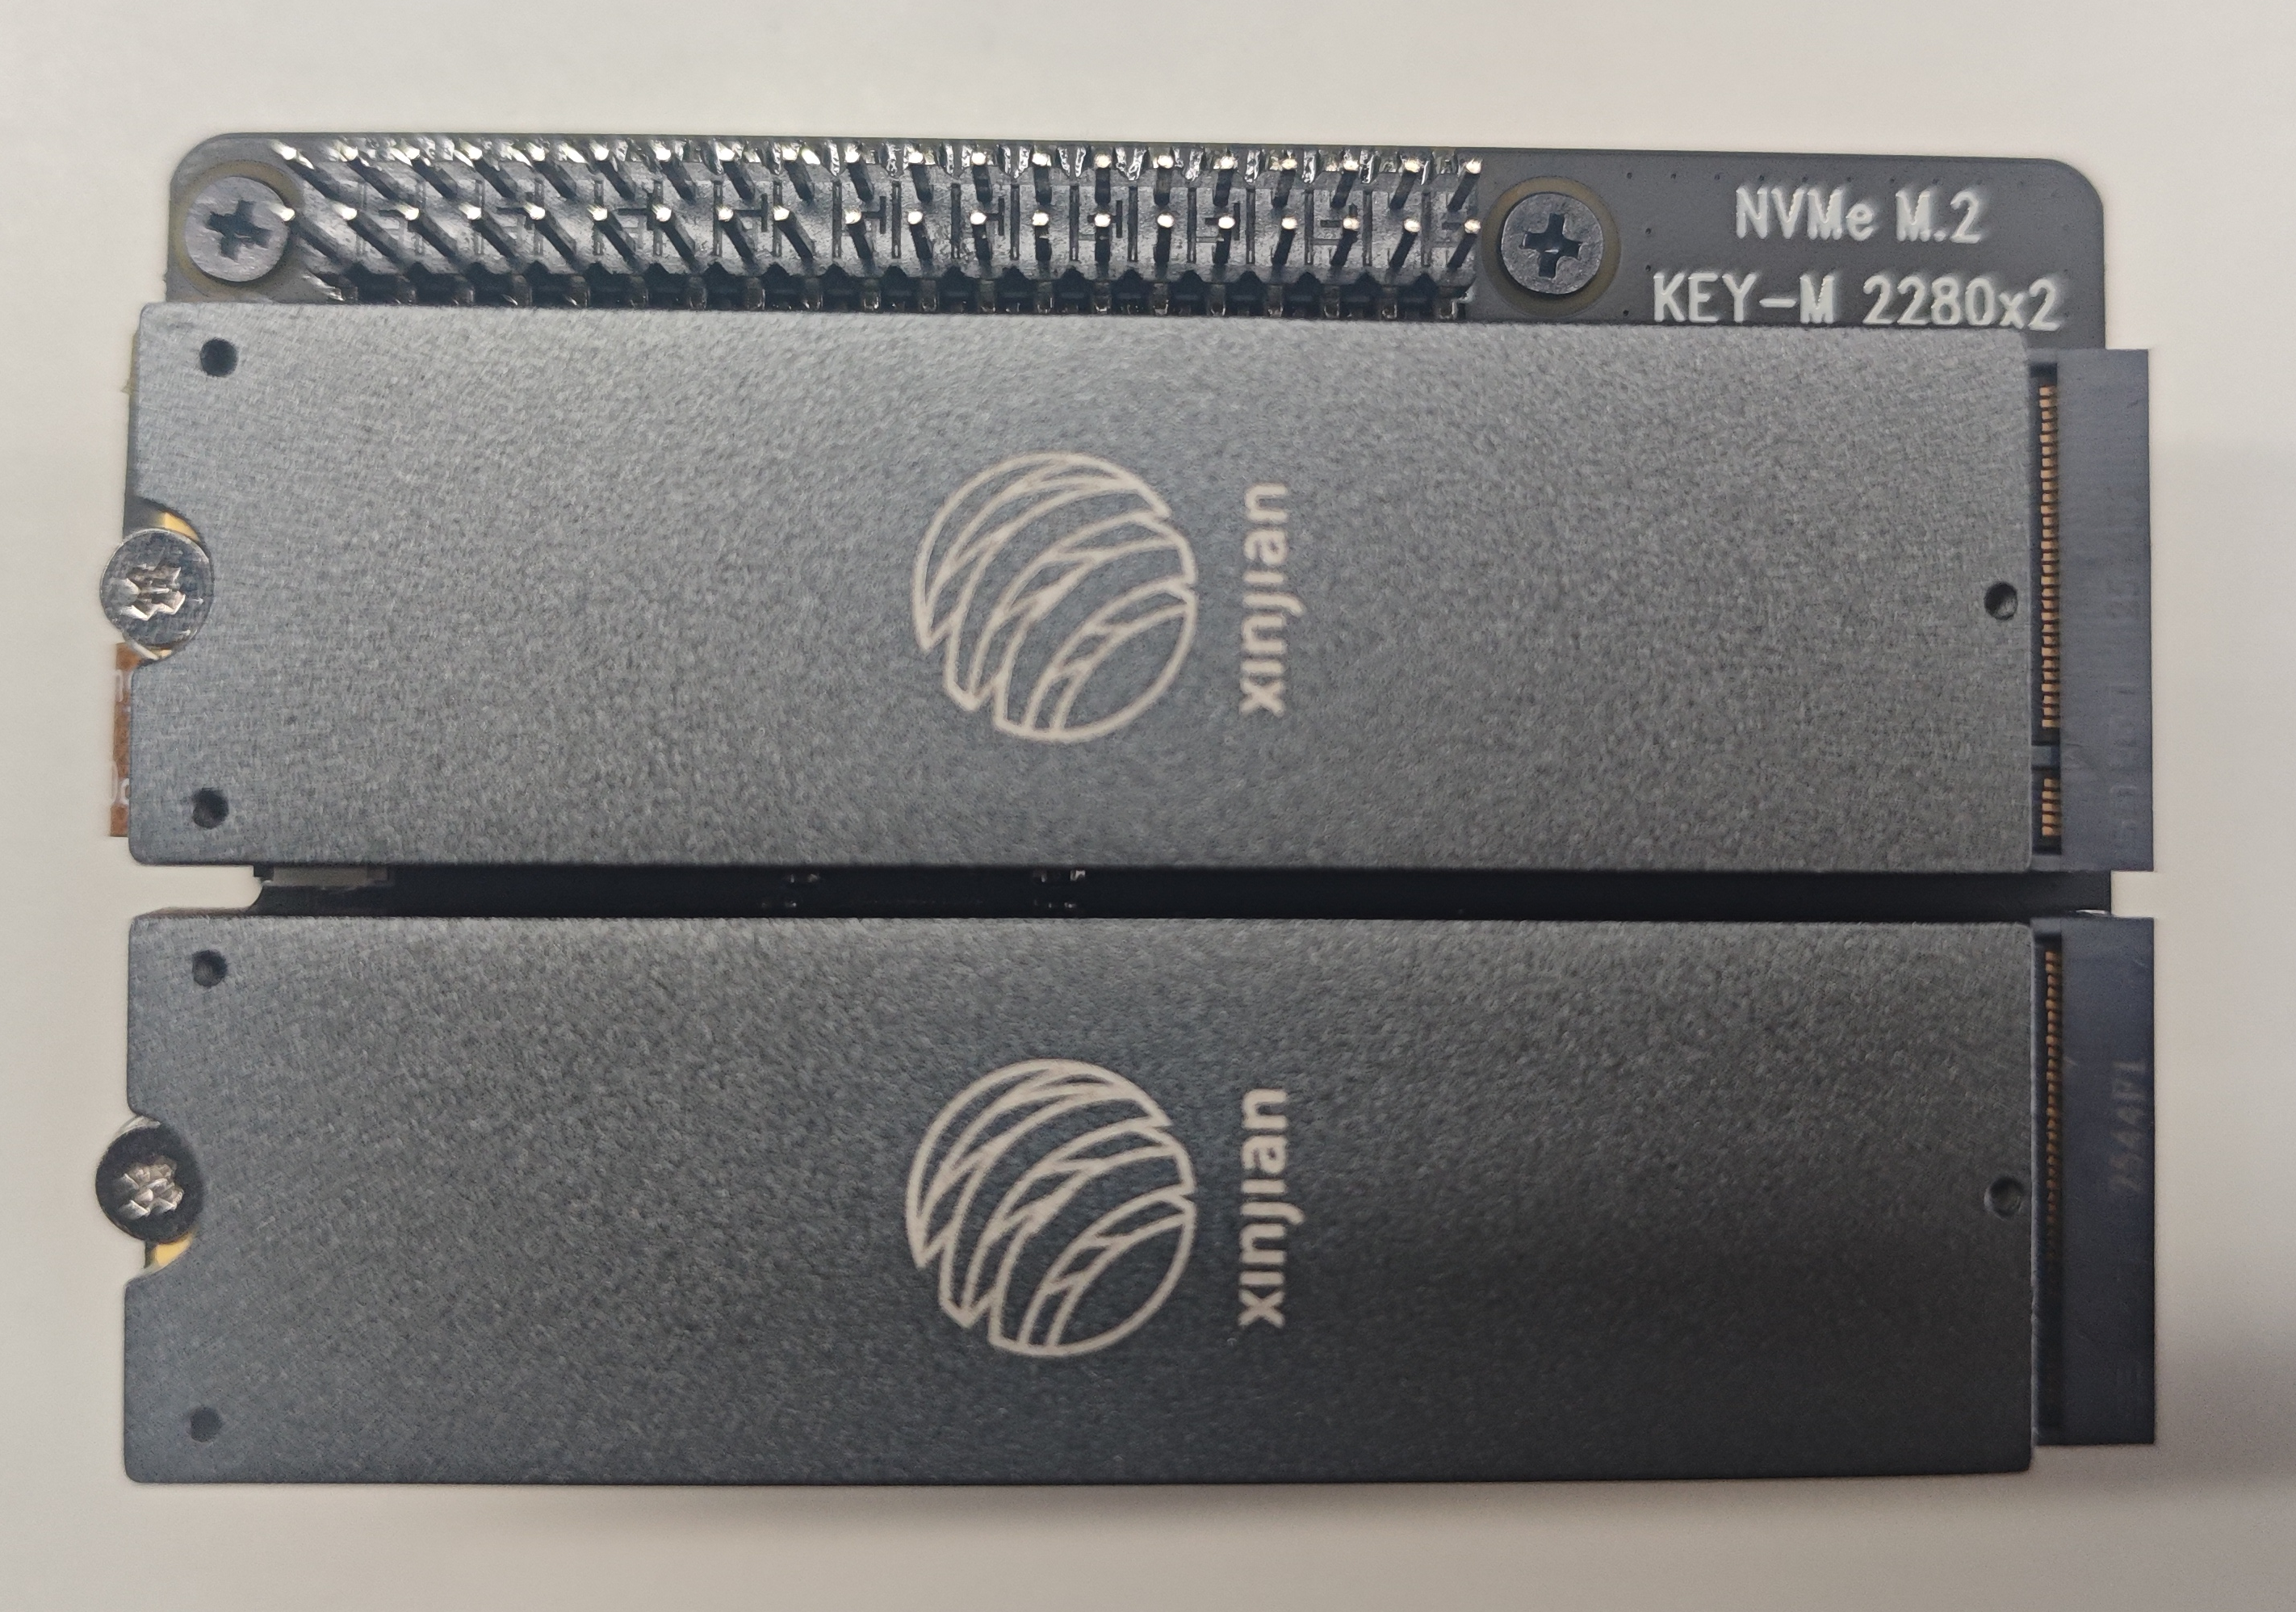
应用展示
树莓派5通过加装一个HAT可以连接两张芯茧算力卡。
UOS
备注
以下示例以统信UOS桌面专业版AMD64 1070 HWE 版本为例。
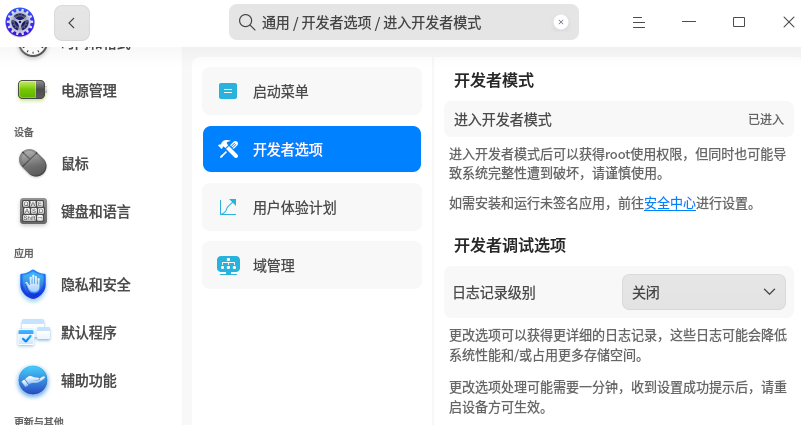
Step1:关闭签名
进入
电源管理-使用电源- 将电脑进入待机模式该为从不。 进入待机后,PCIe链路会断开且不能恢复。建议配置为高性能模式。
进入
开发者选项的安全中心,关闭应用签名。

Step2:系统更新
$ sudo apt update && sudo apt upgrade -y
$ sudo reboot
Step3:安装Linux headers
$ sudo apt install -y linux-headers-$(uname -r)
Step4:升级GCC
UOS 1070 HWE 默认没有安装g++,且gcc版本为8.3.0,而AXCL运行时刻要求C++17标准,最低要求为GCC 9.4.0,因此请参阅 gcc更新 子章节更新GCC到9.4.0.
Step5:安装AXCL
$ sudo apt install -y ./xxx.deb
Step6:验证安装
查看安装包信息
$ apt show axclhost
执行axcl-smi,确认设备能正确找到
$ axcl-smi
+------------------------------------------------------------------------------------------------+
| AXCL-SMI  V3.4.0_20250418095028                                  Driver  V3.4.0_20250418095028 |
+-----------------------------------------+--------------+---------------------------------------+
| Card  Name                     Firmware | Bus-Id       |                          Memory-Usage |
| Fan   Temp                Pwr:Usage/Cap | CPU      NPU |                             CMM-Usage |
|=========================================+==============+=======================================|
|    0  AX650N                     V3.4.0 | 0000:03:00.0 |                153 MiB /      945 MiB |
|   --   38C                      -- / -- | 1%        0% |                 18 MiB /     7040 MiB |
+-----------------------------------------+--------------+---------------------------------------+

+------------------------------------------------------------------------------------------------+
| Processes:                                                                                     |
| Card      PID  Process Name                                                   NPU Memory Usage |
|================================================================================================|
卸载安装
ubuntu等debian系统
$ sudo apt remove axclhost
重要
SDK V3.4.0 以前的版本,请执行dpkg -r axclhost卸载
centos等redhat系统
$ sudo yum remove axcl_host
重要
SDK V3.4.0 以前的版本,请执行sudo rpm -e axcl_host卸载
驱动升级
重要
请先卸载旧驱动,再重新安装新的驱动